


Same-day service · island-wide
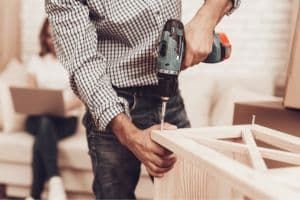
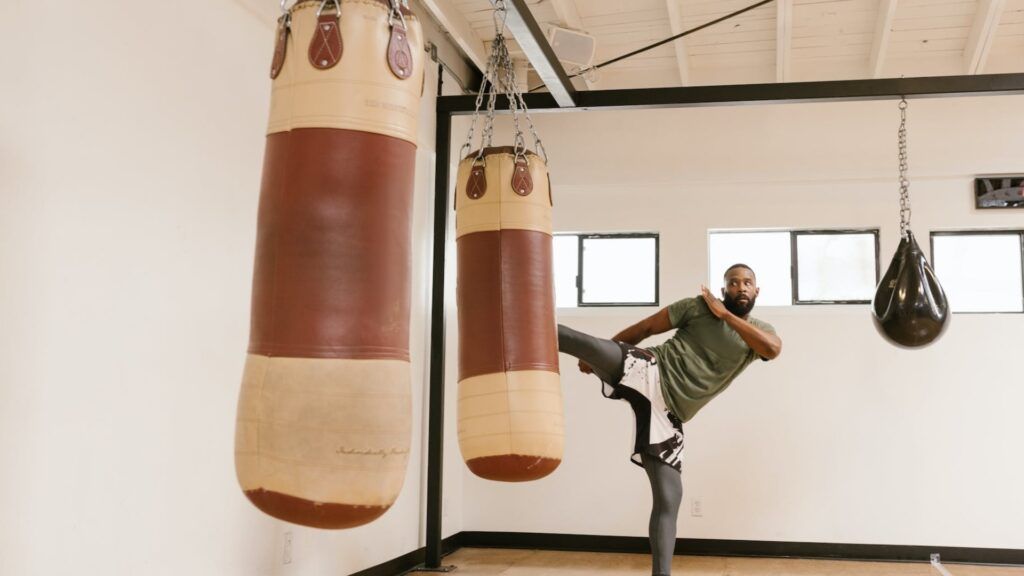
Boxing at Home: Tips for Punching Bag Installation
★★★★★ 5.0 rating
We welcome you to your comprehensive journey of setting up a punching bag effectively and safely at home. Enhancing your workouts and powering your punches is a breeze when your punching bag hangs perfectly in its place.★★★★★ 5.0 rating
Same-day service
Island-wide
Free quotes via WhatsApp
Understanding Your Punching Bag’s Weight
Before we explore the diverse methods of hanging a punching bag, it’s crucial to understand your equipment. The weight of heavy loads can vary greatly. Therefore, the chosen method of turning your bag should be contingent on its weight. It’s widely recommended that a boxing bag should be at least half your weight.
Domestic gym bags typically weigh between 70 and 100 pounds, while heavy-duty bags seen at professional gyms can tip the scales at around 200 pounds. Therefore, the chosen mount should be rated for a minimum of double your bag’s weight. This is because the swinging action can easily double the importance of the pack. Further, with every forceful hit, the bag’s weight crashes back down repeatedly.
Choosing the Ideal Location to Hang Your Bag
Selecting an optimal location for your punching bag is the next essential step. The most popular options include ceiling, wall, and freestanding mounts. While freestanding mountains offer portability, their stability can be a concern, as additional weighting down might be required.
On the other hand, wall mounts limit your ability to move freely for footwork, kicks, dodges, and other movements. Therefore, a ceiling mount is often considered the best choice. However, if your home cannot accommodate a ceiling mount, a wall mount can be a suitable alternative.
Identify a spot in your space large enough to hang the bag and offer sufficient space to maneuver around it. Common locations include basements and garages, although any room with adequate space will work. Remember that the bag should not be too close to a wall or fragile items.

Hanging a Punching Bag in Apartments
Setting up a punching bag in an apartment may appear challenging, but options exist. Outdoor installation, particularly from a tree, can be an exciting alternative, given favorable climate conditions. If you opt for this, we recommend a canvas bag that withstands environmental conditions better than leather or vinyl variants. A freestanding bag that doesn’t require special equipment can also be a solution for apartments.
Hanging a Punching Bag from the Ceiling
Ceiling joists or beams holding up your ceiling are ideal for hanging a punching bag. If your ceiling is finished, a stud finder or knock test can help identify the joists. Remember, ceiling beams are typically placed 16 or 24 inches apart.
Installing the hardware includes a sturdy eyebolt, an S-hook, a power drill, a wrench, and the bag and chains. First, drill a hole into the ceiling joist slightly smaller than your eyebolt’s shaft. Next, firmly screw the eyebolt into the hole using the wrench, connect the bag’s chains to the S-hook, lift the bag, and slide the other end through the eyebolt.
Alternatively, a heavy bag ceiling mount kit can be installed across two or more ceiling joists. Attaching a 2×6 board across the joists with wood screws is the first step, followed by the mount installation. Ensure the mount is securely placed before attaching the bag’s chains using the S-hook.
Hanging a Punching Bag on a Wall
Wall mounting is viable only with masonry walls. Begin by positioning the mount, marking the bolt positions, and drilling into the wall at each spot. Install the bolts once ready, and use the S-hook and chains to hang the bag.
Essential Guide to Properly Install a Boxing Heavy Bag at Home
Incorporating a heavy punching bag into your home gym offers a unique and efficient way to improve your boxing skills without stepping foot in a gym. However, securely installing the heavy boxing bag is critical to ensure safe and effective workouts. This comprehensive guide outlines four robust methods for hanging a punching bag at home.
Pre-installation Considerations
Before proceeding with any installation methods, consider the following factors to determine the best approach for hanging your heavy bag:
- Weight of the Punching Bag: The weight of your punching bag plays a significant role in its installation. A typical home gym punching bag ranges between 70 and 100 pounds. Commercial bags can weigh up to 200 pounds. This weight, combined with the force of your punches and the centrifugal force when the bag swings, means the mounting point must support at least double the bag’s weight.
- Type of Ceiling: The nature of your ceiling is another determinant. For instance, a ceiling with open joists in your garage or basement would suit a ceiling joist or ceiling mount installation. However, other options are available for those who need such ceilings.
Method 1: Utilizing the Ceiling Joist
The ceiling joist, a structural element that supports your ceiling, presents an excellent anchor point for your boxing bag. The following steps guide you through this installation process:
- Locating the Joist: You can find a joist using a stud finder. Start from the edge of a wall, looking for the joist 16″ out, and if not found, try 24″ out.
- Identifying the Joist Center: A thin nail can help find the center of the joist. This precision ensures an even distribution of weight.
- Installing the Hardware: With the center of the joist located, prepare the necessary installation hardware. You will need a power drill, eyebolt, wrench, bag and chains, and an S-hook. Drill a hole into the joist, twist an eyebolt into the hole, and tighten it with a wrench, then connect the chain to the bag and the S-hook. Lift the bag and hang the S-hook to the eyebolt.
Method 2: Ceiling Mount Installation
If using the joist directly isn’t feasible or desirable, a ceiling mount is a reliable alternative. Here’s how to install a heavy bag using a ceiling mount:
- Identifying the Mounting Point: Find the ceiling joist or support beam for the mount’s installation. The point where the post meets the support beam typically provides maximum support for the bag.
- Installing the Ceiling Mount: Mark the mount’s placement, drill holes, and install the mount with the supplied hardware. Attach the chains to the bag and the S-hook, lift the bag, and hang it on the mount.
Method 3: Wall Mount Installation
In cases where a ceiling installation isn’t feasible, consider using a wall mount. Important to note is to only mount the heavy bag on masonry walls, not drywall. Here’s an essential guide for installing a heavy bag wall mount:
- Installing the Wall Mount: Mark the mount’s placement on the wall, drill holes, and install the mount with the included hardware.
- Hanging the Bag: If, for any reason, a ceiling mount is unfeasible, the wall mount presents a viable alternative for installing your heavy bag. However, it’s crucial to note that drywall installation is highly discouraged due to its frail nature. A sturdy masonry wall is most suitable for this installation.
Here are the step-by-step instructions to achieve a secure wall mount installation:
- Position the wall mount against the masonry wall where you desire to hang the punching bag. Use a marker to indicate where the mount bolts will be installed.
- Utilizing your power drill, create holes in the wall at the marked spots. The holes must align perfectly with the bolt holes on the mount.
- Align the mount holes with the drilled holes on the wall. Attach the mount to the wall using the supplied hardware and tools, including the screwdriver and wrench.
- Connect your punching bag to the chains, then attach the chains to the S-hook.
- With the aid of another person, lift the bag and attach the S-hook to the wall mount. Ensure that the bag is firmly suspended and not touching the floor.
As with other installation methods, it is highly recommended to test the stability of the wall mount after installation. Again, a few test punches will ensure the bag is securely in place.

Utilizing Freestanding Heavy Bag Stands for an Efficient Setup
A freestanding heavy bag stand is an excellent alternative for individuals who do not have the luxury of making permanent alterations to their space, such as renters, or those simply uncomfortable with drilling holes into the wall or ceiling. Please note, however, that this option should be considered a last resort due to its potential instability. These stands wobble, move, and could tip over during vigorous workouts.
To mitigate this, it’s recommended to add weights to the stand to increase its stability.
To hang your punching bag on a freestanding stand, follow these steps:
- Attach your punching bag to the chains.
- Connect the chains to the S-hook.
- Hang the load on the stand using the S-hook. Ensure that the bag is suspended securely and not brushing the floor.
Regardless of the stand’s stability, always take necessary precautions when using a freestanding stand.
Conclusion
Regardless of the chosen method for hanging your heavy bag for home boxing workouts, the crucial point is to ensure the load is securely in place before commencing any workout sessions. Adhering to the appropriate punching bag installation instructions will help prevent potential damage and accidents, ensuring your safety during workouts.
With a proper setup, you’re just a few punches away from enjoying the thrills and benefits of boxing from the comfort of your home.
Why Choose Pro Handyman for your Aircon Servicing?
Choosing Pro Handyman’s aircon servicing in Singapore ensures you receive exceptional quality aircon services from our trained and certified technicians. As a leading aircon servicing company, we specialize in various aircon brands and provide the best aircon servicing Singapore residents can rely on.Customer Satisfaction
Our commitment to customer satisfaction means we offer timely, reliable servicing tailored to your specific needs.
Fast and Efficient Service
With Pro Handyman, you can rest assured that your comfort is our top priority
Quality Tools
Our commitment to customer satisfaction means we offer timely, reliable servicing tailored to your specific needs.
How it works
From WhatsApp to done, same day
1
Tell us the job
WhatsApp a photo or pick your service in the form. Share your property type and what needs doing.
2
Get a free quote
We reply the same day with a clear, upfront quote. No obligation, no surprises.
3
We get it done
Book a slot that suits you. Our vetted handymen arrive on time and tidy up after the work.
FAQ
FAQs for Aircon Servicing Singapore
What is included in Pro Handyman's aircon servicing Singapore?
Our aircon servicing includes general cleaning of air filters, vents, and outer panels, checking system controls and thermostats, chemical cleaning of aircon components, refrigerant top-up, and diagnosing and repairing any mechanical or electrical issues.
How often should I service my aircon?
We recommend scheduling a service every three to four months for optimal performance and longevity of your air conditioning system.
What are the signs that my aircon needs servicing?
Common signs that your aircon may require servicing include insufficient cooling, water leakage, unusual noises, and foul smells from the unit.
Reviews
What our customers say
★★★★★ 5.0 rating
I had a great experience with this handyman services company when I needed help assembling and installing new shelves in my home office. The handyman they sent was friendly, efficient, and detail-oriented. The shelves look fantastic, and I will definitely be using their services again for future projects.
I hired this handyman services company to repair some damage to my drywall caused by a plumbing issue. Not only did they fix the drywall perfectly, but they also provided helpful tips on how to prevent future issues. The handyman was polite, tidy, and completed the job in a timely manner.
I recently hired the handyman services company for a variety of home repairs, including fixing a leaky faucet, painting a bedroom, and installing a new ceiling fan. The handyman was punctual, professional, and extremely knowledgeable. I highly recommend their services.
Contact us for a Quote Now
Contact Pro Handyman Handyman Services today for all your repair and maintenance needs in Singapore. Our team at Pro Handyman is committed to providing swift and efficient service.
Same-day response
Free quotes via WhatsApp
★★★★★ 5.0 rating
Service Location in Singapore
We offers premium handyman services throughout Singapore. We serve all areas of the island, including Pasir Ris, Bedok, Novena, Jurong, Orchard, and Sentosa, ensuring consistent quality and reliability in every service we provide.