
Last Updated on June 4, 2023 by Pro Handyman Editorial Team
Mastering the Art of Carpentry: A Comprehensive Guide for Novices
Carpentry, a field rich with history and skill, has long stood as an essential trade. To assist budding carpenters in mastering this art, we present a detailed exploration of the subject, covering everything from essential equipment to the opportunities and challenges the profession entails.
Fundamentals of Carpentry
Diving into the world of carpentry requires a clear understanding of the fundamentals. The craft involves intricate activities ranging from selecting the ideal wood type to learning how to apply a finish to a project proficiently. Carpentry’s diversity offers a multitude of opportunities, whether it be the construction of unique furniture pieces or the erection of sizable buildings.
Selecting Wood
Wood is the canvas of a carpenter’s art. Understanding different wood types, their properties, and their uses is pivotal to the success of a project. The choice of wood determines a finished item’s durability, aesthetics, and functionality.
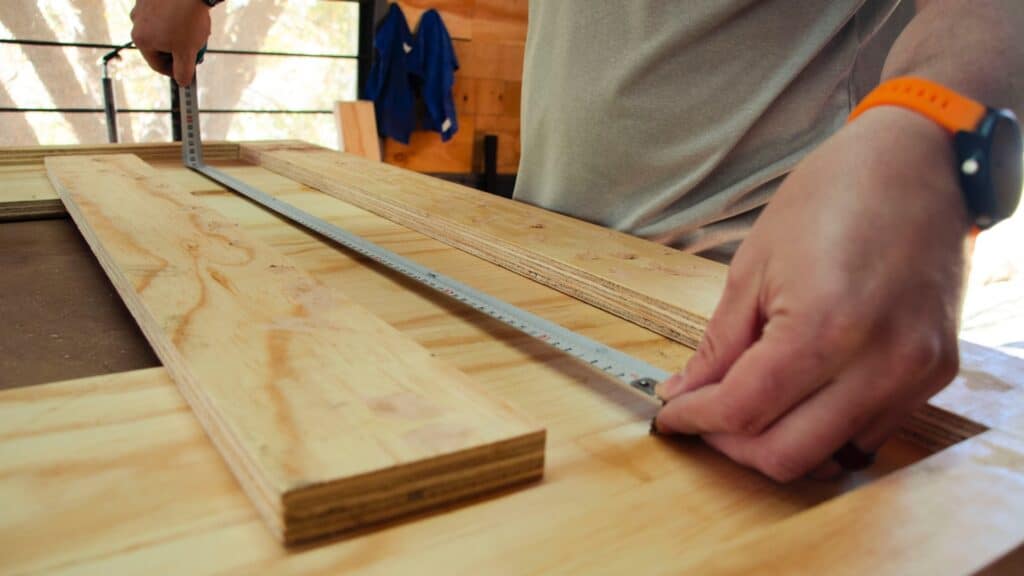
Precision Cutting
Accurate measurements and precision cuts underpin successful carpentry. To create aesthetically pleasing and functional items, carpenters must be adept at interpreting blueprints and transforming a piece of wood into an exact design replica.
Creating Joints
Joinery is an integral aspect of carpentry, connecting different wood pieces to create a stable structure. Therefore, a carpenter must be proficient in crafting dovetail, mortise and tenon, and lap joints.
Applying Finishes
Finishing involves applying substances to a completed woodworking project to enhance its aesthetics and protect it from environmental factors. The choice of finish can dramatically alter the look and feel of a project, offering a final touch of personality and style.
Pathways to Learn Carpentry Skills
Whether you wish to pick up carpentry as a hobby or contemplate it as a profession, various avenues are open for you to acquire the skills required.
Formal Education and Apprenticeships
Community colleges and vocational schools offer structured carpentry programs for a thorough understanding. Apprenticeships also provide a unique opportunity, coupling hands-on experience with theoretical learning.
On-the-Job Training
Many established contractors provide on-the-job training, a pathway where learning and earning go hand-in-hand. You receive practical knowledge under the supervision of experienced carpenters while contributing to real-world projects.
Self-Learning
For those who prefer a self-paced approach, the internet offers abundant resources. Online courses, tutorials, and forums provide comprehensive knowledge about carpentry techniques, tools, and safety measures.
Carpentry as a Career: Considerations and Prospects
Carpentry as a profession demands commitment and hard work. An apprenticeship, typically around four years, provides the foundation for your journey in this craft.
Earnings and Progression
Starting salaries for carpenters are competitive, with the potential for increment as your skills and experience grow. Additionally, there is ample opportunity for advancement, from a journeyman to a master carpenter, depending on your dedication and prowess.
Regulatory Bodies and Certifications
Membership in provincial regulatory bodies is generally advised for professional carpenters. Besides ensuring professional recognition, these bodies offer support, advice, and updates on changing industry standards.

Safety Concerns
As with any construction trade, safety is paramount in carpentry. Awareness and adherence to safety protocols, combined with the correct usage of safety equipment, minimize the risk of injuries.
Essential Tools for Carpentry
Carpentry is an equipment-intensive trade, and understanding the purpose and operation of these tools is critical to a carpenter’s success.
Basic Tools
At the core of a carpenter’s toolkit are the basics: hammers, nails, saws, and drills. Therefore, familiarity and skill with these tools are vital.
Advanced Tools
As your skills advance, so too will the complexity of your toolkit. Specialized tools like chisels and planes come into play, allowing for more refined work and finishes.
Safety Equipment
Safety equipment, including hard hats, respirators, and gloves, protect carpenters from workplace hazards and should always be used where required.
Rising Above Challenges in Carpentry
Carpentry, while rewarding, presents its unique set of challenges. It requires creativity, problem-solving skills, and patience to transform a wood block into a product of beauty and function.
Overcoming Physical Challenges
From working on ladders to dealing with allergens, physical challenges are part and parcel of a carpenter’s life. Ensuring appropriate safety measures and maintaining physical fitness can help you navigate these challenges.
Maintaining Safety
Working with sharp tools and heavy machinery can pose risks. However, adherence to safety norms, correct handling of devices, and wearing suitable safety gear can mitigate these risks.
Delivering Customized Solutions
Meeting customer expectations for unique designs is a constant challenge. However, it allows you to stretch your creative muscles and deliver a piece that genuinely delights your customer.
Mastering DIY Finish Carpentry
Mastering the art of finishing carpentry can transform your DIY projects from satisfactory to stunning, even under the most challenging circumstances. This comprehensive guide shares many professional insights to enhance your DIY finish carpentry endeavors.
Unraveling the Art of Finish Carpentry
Finish carpentry is the final stage in any carpentry project, encompassing the installation of various trim features around windows, doors, stairs, baseboards, crown molding, chair rails, and more. Following are industry-tested techniques for perfecting your finish carpentry skills.

Addressing Miter Challenges: Beyond the Basics
Handling Open Miters
When a doorjamb extends beyond the wall, the finish trim struggles to lay flat, leading to an open miter joint. The optimal remedy is to introduce a “back bevel.” This involves placing a pencil or shim underneath the molding, a little behind where the cut will be. Next, make cuts on both miter sides with the shim in the same position, test the fit, and adjust as necessary. This technique allows for compensation for all kinds of wall variations.
Accommodating Steep Angles
Occasionally, your project might require miter angles greater than what most miter saws can offer. An angled block of wood can be a helpful guide in such cases. First, cut the wood at a 45-degree angle and create a flat area for the clamp. You can then clamp the molding to the block and align the miter saw to make the precise cut.
Ensuring Precise Trim Fitting
Fitting Trim to Uneven Walls
Sometimes, your casing might be larger than the space between the door and the wall, necessitating careful fitting against an uneven wall. This is where scribing tools come into play. With your chosen device, you can scribe a line on the casing and cut along the lines with a circular saw. This method facilitates a tight fit against uneven surfaces, enhancing the aesthetics and stability of your trim carpentry.
Managing Baseboard Gaps
When baseboards cannot be forced against the wall due to a missing stud, a well-placed nail can solve the problem. First, drive an 8d finish nail into the plate at an angle. In hardwood trim, pre-drilling a pilot hole is recommended. Then, set the nail head slightly below the surface using a hammer and a nail set.
Navigating Through Tough Transitions
Crafting Decorative Transition Blocks
Changes in floor height can create an unsightly jog in the baseboard. However, a decorative block of wood can make this transition smooth. The block should be slightly thicker than the baseboard, with a beveled or routed profile at the top. Transition blocks can be highly effective and aesthetically pleasing for aligning moldings and managing challenging transitions.
Managing Baseboard Humps
Sometimes, studs misaligned with the plate can create humps in the wall, causing gaps in the baseboard. A bold solution involves cutting out a small chunk of drywall at the hump to see the problem and then readjusting the stud by cutting the nails and holding it to the plate. The stud can then be pushed back and reattached with an angled screw.
Preparing for Trim Installation
Cleaning out Corners
Drywall corners often accumulate excess joint compound, hindering the fitting of baseboards. Before installing the base, mark the top of the baseboard on the wall and scrape away the excess mud beneath the line.
Utilizing an Oscillating Multi-Tool
An oscillating multi-tool can be indispensable on a trim job. Whether it’s trimming the bottom of an installed casing or not
Conclusion
The world of carpentry offers endless opportunities for those willing to invest time and effort. If you find joy in creating with your hands, value precision, and are captivated by the charm of wood, carpentry might be your calling.